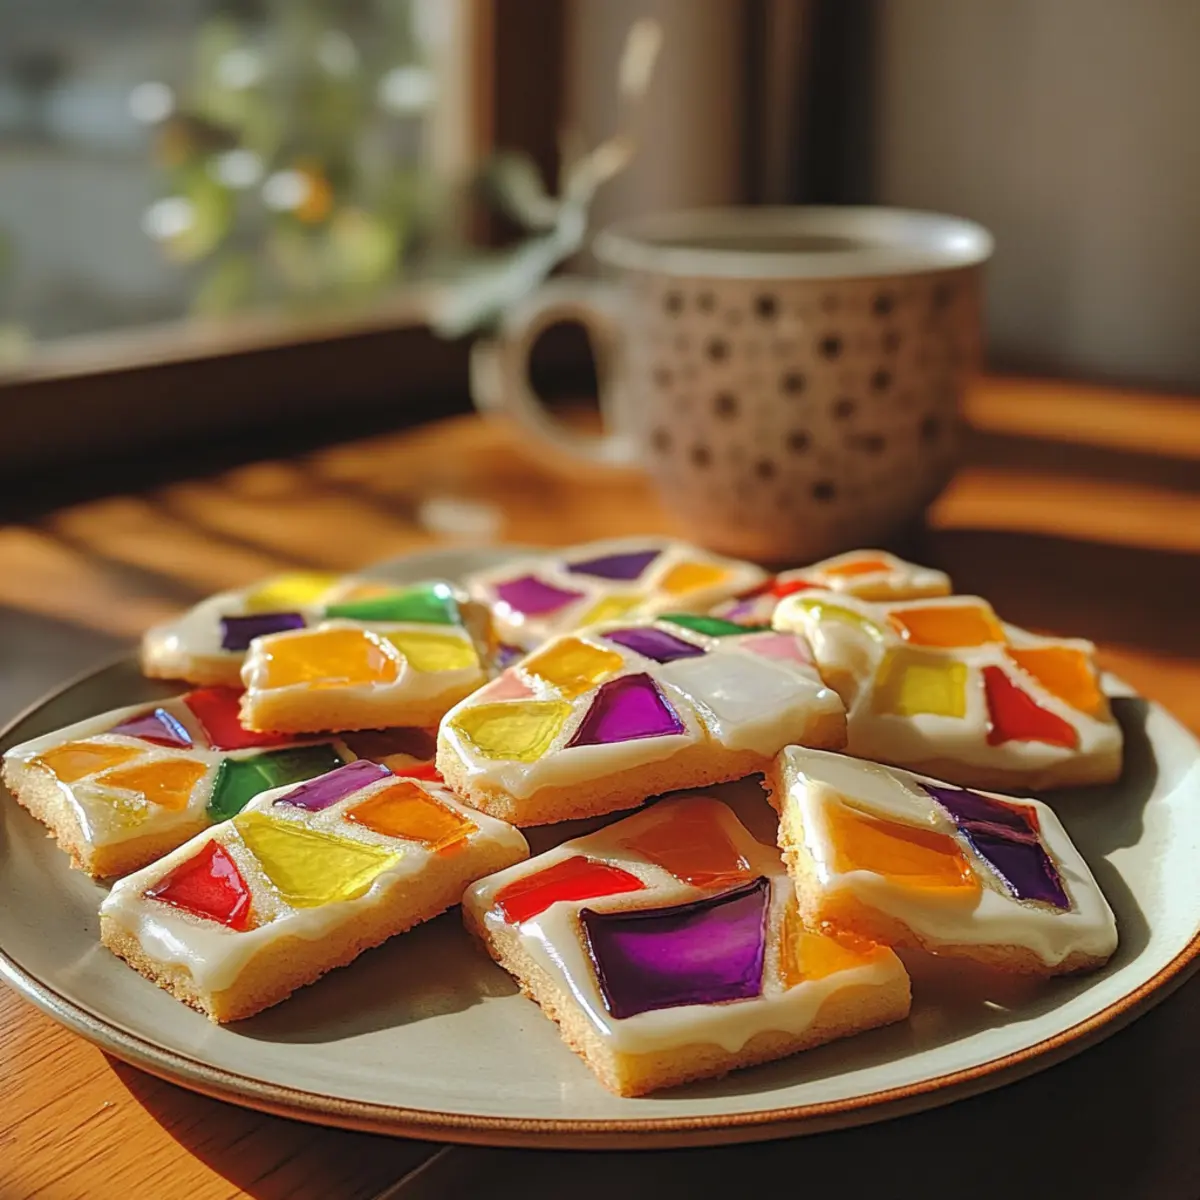
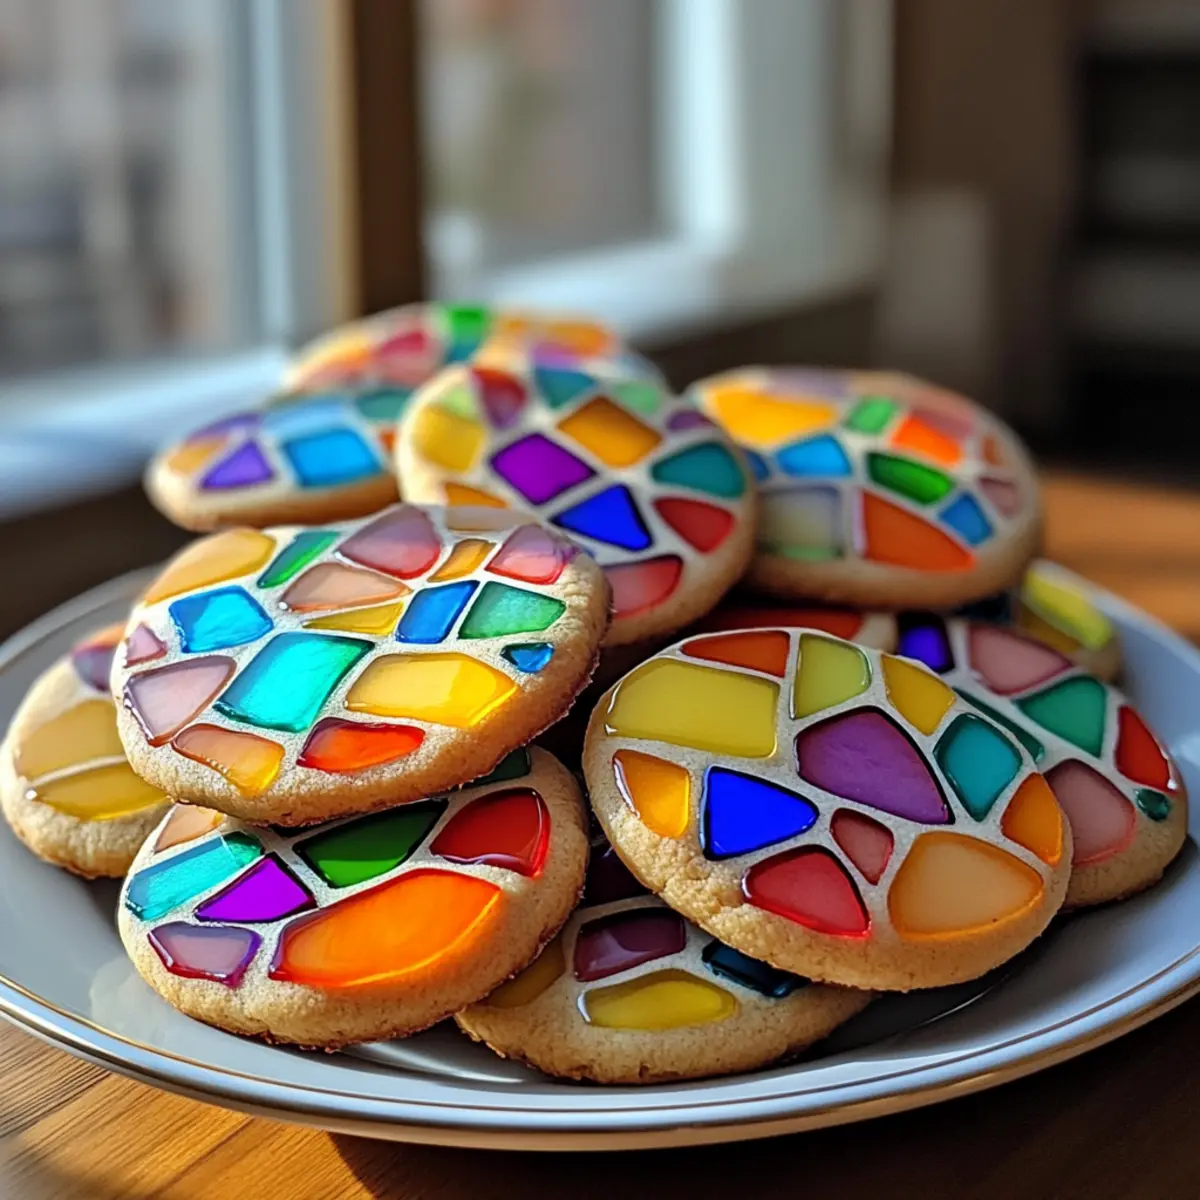
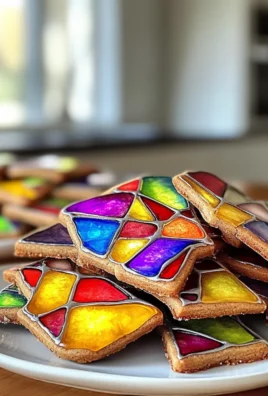
There’s something truly enchanting about the vibrant swirl of colors reflected in these Amazing Stained Glass Window Cookies. As the sweet scent of freshly baked goodness fills my kitchen, I’m transported back to childhood baking sessions—where creativity and laughter were just as essential as the ingredients themselves. These cookies offer a delightful crunch with a chewy center, making them a treat that’s as pleasing to the palate as it is to the eye.
Perfect for any occasion—be it a festive holiday gathering or a cheerful birthday party—these cookies can be easily personalized with different shapes and candy types to match the spirit of the event. The combination of colors and flavors makes them an edible canvas, sparking joy and conversation around any dessert table. So roll up your sleeves, and let’s embark on a fun baking adventure that the whole family will adore!
Why You’ll Love These Amazing Stained Glass Window Cookies
Colorful Creativity: These cookies turn baking into a vibrant art project. Kids (and adults!) will love crushing the hard candies to create a stunning stained glass effect.
Customizable Fun: With endless options for cookie shapes and candy types, you’ll never get bored making these delicious treats for any celebration!
Crisp and Chewy Delight: The balance of a crunchy exterior and chewy center makes every bite a delightful experience.
Easy to Follow: Even novice bakers can tackle this recipe with confidence. Just follow the simple steps, and you’ll create a breathtaking dessert!
Crowd Pleaser: Perfect for parties, gatherings, or just a fun family activity, these cookies will leave everyone asking for seconds! For a delightful pairing, try them alongside a warm drink or a delicious platter of Decadent Peanut Cookies.
Amazing Stained Glass Window Cookies Ingredients
• Get ready to create edible masterpieces!
For the Cookie Base
• All-Purpose Flour – Essential for structure; do not substitute with gluten-free flour without careful adjustments.
• Granulated Sugar – Provides sweetness; feel free to reduce for a less sugary cookie.
• Brown Sugar – Adds moisture and depth; you can use light or dark for richer flavor.
• Butter – Brings richness and tenderness; unsalted is best for controlling saltiness.
• Eggs – Bind ingredients together; use room temperature for better incorporation.
• Vanilla Extract – Infuses delightful flavor; almond extract is a great alternative for a twist.
• Salt – Balances sweetness; a pinch is helpful, but you can skip it if using salted butter.
For the Stained Glass Center
• Hard Candies – Creates the stunning stained glass effect; crush into small pieces for best results.
Enjoy the colorful fun of making these Amazing Stained Glass Window Cookies with your loved ones!
How to Make Amazing Stained Glass Window Cookies
-
Preheat Oven: Begin by setting your oven to 350°F (175°C). As it heats up, prepare two baking sheets lined with parchment paper to prevent sticking.
-
Cream Together: In a large mixing bowl, combine the softened butter, granulated sugar, and brown sugar. Beat them together until the mixture is light and fluffy, typically about 2-3 minutes.
-
Add the Eggs: Incorporate the eggs one at a time, mixing well after each addition. Then, stir in the vanilla extract until the ingredients are evenly combined and smooth.
-
Mix Dry Ingredients: In a separate bowl, whisk together the all-purpose flour and salt. Gradually add this dry mixture to your wet ingredients, folding gently until just combined to avoid overmixing.
-
Fold in Candies: Carefully fold in the crushed hard candies, ensuring they are evenly dispersed. Remember, it’s tempting, but try not to snack on the candy just yet!
-
Scoop and Bake: Use a tablespoon to drop mounds of cookie dough onto your prepared baking sheets, spacing them about 2 inches apart. Bake in the preheated oven for 10-12 minutes, or until the edges turn a lovely golden brown. Let them cool for a few moments before transferring to a wire rack.
Optional: Decorate with a sprinkle of powdered sugar for an extra touch of sweetness!
Exact quantities are listed in the recipe card below.

Make Ahead Options
These Amazing Stained Glass Window Cookies are perfect for busy weeknights and can be made ahead of time, saving you precious moments in the kitchen! You can prepare the cookie dough and refrigerate it for up to 3 days, making it easy to whip up fresh cookies whenever cravings hit. Simply wrap the dough tightly in plastic wrap to prevent drying out. When you’re ready to bake, scoop out mounds of dough and drop them onto lined baking sheets. Preheat your oven and bake them straight from the fridge for delicious cookies that are just as vibrant and delightful! This meal prep strategy allows you to enjoy homemade treats with minimal effort.
How to Store and Freeze Amazing Stained Glass Window Cookies
Room Temperature: Store cookies in an airtight container at room temperature for up to one week. This keeps them fresh and chewy!
Fridge: If you prefer, these cookies can be stored in the fridge for up to 10 days. Just ensure they are sealed to prevent drying out.
Freezer: For longer storage, freeze cookies in a single layer on a baking sheet, then transfer to an airtight container. They can be frozen for up to 3 months.
Reheating: To revive their chewy texture, microwave cookies for about 10 seconds or warm them in a preheated oven at 300°F (150°C) for a few minutes. Enjoy your Amazing Stained Glass Window Cookies!
What to Serve with Amazing Stained Glass Window Cookies?
These vibrant cookies are perfect for inspiring a complete dessert experience, bringing joy to every bite.
-
Creamy Hot Chocolate: Rich and velvety, this drink complements the sweetness of the cookies while providing a comforting warmth.
-
Fresh Fruit Salad: Bright, juicy fruits add a refreshing contrast to the cookies’ sweetness, making for a delightful and balanced treat.
-
Vanilla Ice Cream: Scoop a generous serving alongside the cookies; the creamy texture and cool temperature create a wonderful combination.
-
Milk: A classic pairing, the coldness of milk perfectly balances the sweetness of the cookies—every dunk feels like a childhood memory!
-
Coffee or Espresso: The bold flavors of coffee cut through the sweetness, making for an elegant pairing that adults will particularly enjoy.
-
Lemonade or Citrus Punch: The zesty brightness of citrus drinks enhances the vibrant colors of the cookies, creating a cheerful celebration on your palate.
-
Chocolate Dipped Strawberries: Elevate your dessert table with these rich bites that echo the candy in the cookies, providing a delicious, edible art experience.
-
Soft Serve Sundae: Transform your dessert into a sundae delight by topping the cookies with soft serve, sprinkles, and a drizzle of chocolate sauce.
-
Spiced Apple Cider: This warm beverage brings seasonal comfort and a hint of spice, harmonizing beautifully with the sweet and chewy cookie flavors!
Expert Tips for Amazing Stained Glass Window Cookies
-
Cup Measurements: Ensure you use accurate cup measurements for flour and sugar. Too much flour can lead to dry cookies, while too little can make them too soft.
-
Candy Prep: Crush hard candies into small, even pieces. Larger chunks may not melt properly, compromising the beautiful stained glass effect.
-
Chill Dough: If the dough becomes too sticky, pop it in the refrigerator for 15-30 minutes. This makes it easier to scoop and shape without sticking.
-
Watch the Bake: Every oven is different, so start checking the cookies around the 10-minute mark to prevent overbaking, which can lead to hard cookies.
-
Mix with Care: When adding the flour, remember to mix just until combined. Overmixing can result in dense cookies, missing the delightful texture we love in these Amazing Stained Glass Window Cookies.
Amazing Stained Glass Window Cookies Variations
Feel free to explore these delightful twists that make your cookies even more personal and colorful!
-
Dairy-Free: Substitute butter with a dairy-free margarine or coconut oil for a rich yet dairy-free treat. Enjoy the same wonderful cookie experience without the dairy.
-
Gluten-Free: Use a 1:1 gluten-free flour blend instead of all-purpose flour, ensuring your cookies remain deliciously tender and safe for gluten-sensitive friends.
-
Flavor Boost: Swap vanilla extract for almond or lemon extract to give your cookies a new dimension of flavor. A hint of lemon can brighten up those sweet notes beautifully!
-
Themed Shapes: Use cookie cutters shaped like festive characters or seasonal symbols to create themed cookies. Perfect for any occasion—the fun shapes add excitement to your baking!
-
Spicy Kick: Add a pinch of cinnamon or a dash of cayenne pepper to the dough for a surprising warmth that counterbalances the sweetness. Your guests will love this unexpected twist!
-
Candy Variety: Experiment with different types of hard candies like Jolly Ranchers or Lifesavers for unique flavors and colorful effects. Each cookie can tell a different story with its vibrant hues!
-
Nutty Addition: Incorporate chopped nuts such as pecans or walnuts into the dough for a delightful crunch. This not only adds texture but also enriches the flavor profile of your cookies.
-
Chocolate Drizzle: After baking, drizzle melted chocolate over the cooled cookies to elevate your treats further. This decadent addition adds both visual appeal and a rich layer of flavor.
Let your creativity shine in the kitchen with these variations while enjoying every moment of the baking journey!
Amazing Stained Glass Window Cookies Recipe FAQs
What type of hard candies work best for staining glass cookies?
Absolutely! I recommend using clear or translucent hard candies like Jolly Ranchers or Life Savers. These candies melt beautifully and create that stunning stained glass effect. Just be sure to crush them into small pieces, about the size of a marble—too large, and they may not melt evenly, compromising the visual appeal.
How should I store my stained glass cookies to keep them fresh?
To keep your Amazing Stained Glass Window Cookies fresh, store them in an airtight container at room temperature for about one week. If you’d like the cookies to remain chewy, avoid exposing them to air. You can also refrigerate them for up to 10 days, but be sure they’re well sealed to maintain moisture.
Can I freeze stained glass window cookies for future enjoyment?
Yes, you can! To freeze your cookies, lay them in a single layer on a baking sheet, allowing them to harden in the freezer for about 1-2 hours. Once frozen, transfer the cookies to an airtight container or a freezer bag. They can be kept in the freezer for up to 3 months and are perfect for a quick treat later on. When ready to eat, just thaw them at room temperature or warm them up briefly in the oven.
What should I do if my cookies spread too much while baking?
If your Amazing Stained Glass Window Cookies spread excessively, it could be because the butter was too warm or you added too much flour. I suggest chilling the dough for about 30 minutes before baking, which helps the cookies maintain their shape. Also, make sure to follow the measurements exactly—accurate ingredient ratios are crucial to achieving the perfect cookie texture!
Are these cookies suitable for people with dietary restrictions?
If you’re making these cookies for someone with dietary restrictions, take care with the hard candies, as they may contain allergens like gluten or dairy. You can also adjust the recipe to be egg-free by using a flax egg (1 tablespoon ground flaxseed mixed with 2.5 tablespoons water) and opt for non-dairy butter substitutes. With these tweaks, everyone can enjoy your Amazing Stained Glass Window Cookies!

Amazing Stained Glass Window Cookies: A Fun Kitchen Adventure
Ingredients
Equipment
Method
- Preheat Oven: Begin by setting your oven to 350°F (175°C). As it heats up, prepare two baking sheets lined with parchment paper to prevent sticking.
- Cream Together: In a large mixing bowl, combine the softened butter, granulated sugar, and brown sugar. Beat them together until the mixture is light and fluffy, typically about 2-3 minutes.
- Add the Eggs: Incorporate the eggs one at a time, mixing well after each addition. Then, stir in the vanilla extract until the ingredients are evenly combined and smooth.
- Mix Dry Ingredients: In a separate bowl, whisk together the all-purpose flour and salt. Gradually add this dry mixture to your wet ingredients, folding gently until just combined to avoid overmixing.
- Fold in Candies: Carefully fold in the crushed hard candies, ensuring they are evenly dispersed.
- Scoop and Bake: Use a tablespoon to drop mounds of cookie dough onto your prepared baking sheets, spacing them about 2 inches apart. Bake in the preheated oven for 10-12 minutes, or until the edges turn a lovely golden brown. Let them cool for a few moments before transferring to a wire rack.
Notes
Leave a Comment